
Mode Help
Integrations
Set up a data source connectionSemantic layer integrations
Create a Semantic Layer DatasetShare Semantic Layer Datasets
Semantic layer integrations
Set up a data source connection
To get started, first set up a new data source connection to the semantic layer.
For the dbt Semantic Layer connection in Mode, you will need the following:
- dbt Cloud Hostname: The hostname for the instance of dbt Cloud.
- Environment ID: The unique identifier for a dbt environment in the dbt Cloud URL, when you navigate to that environment under Deployments.
- Service Token: Service Tokens for dbt Cloud can be created in dbt account settings, and must have at least "Semantic Layer Only" permissions.
For the Looker SQL connection in Mode, leveraging Looker's Open SQL interface, you will need the following:
- Host: The url of your Looker instance (e.g. test123.looker.com).
- Username: The Client ID portion of the Looker API key.
- Password: The Client Secret portion of the Looker API key.
Create a Semantic Layer Dataset
Once you’ve connected your semantic layer, create a Dataset to enable end user visual exploration. Navigate to the plus button in the top right, and select Make a reusable Dataset. You’ll be taken to a SQL editor interface.
Once you’ve pulled in your data, you can add additional fields via Calculated Fields or add descriptions for the existing fields. Check out Mode’s API endpoints for creating and updating field descriptions to programmatically add and update descriptions from your semantic layer documentation.
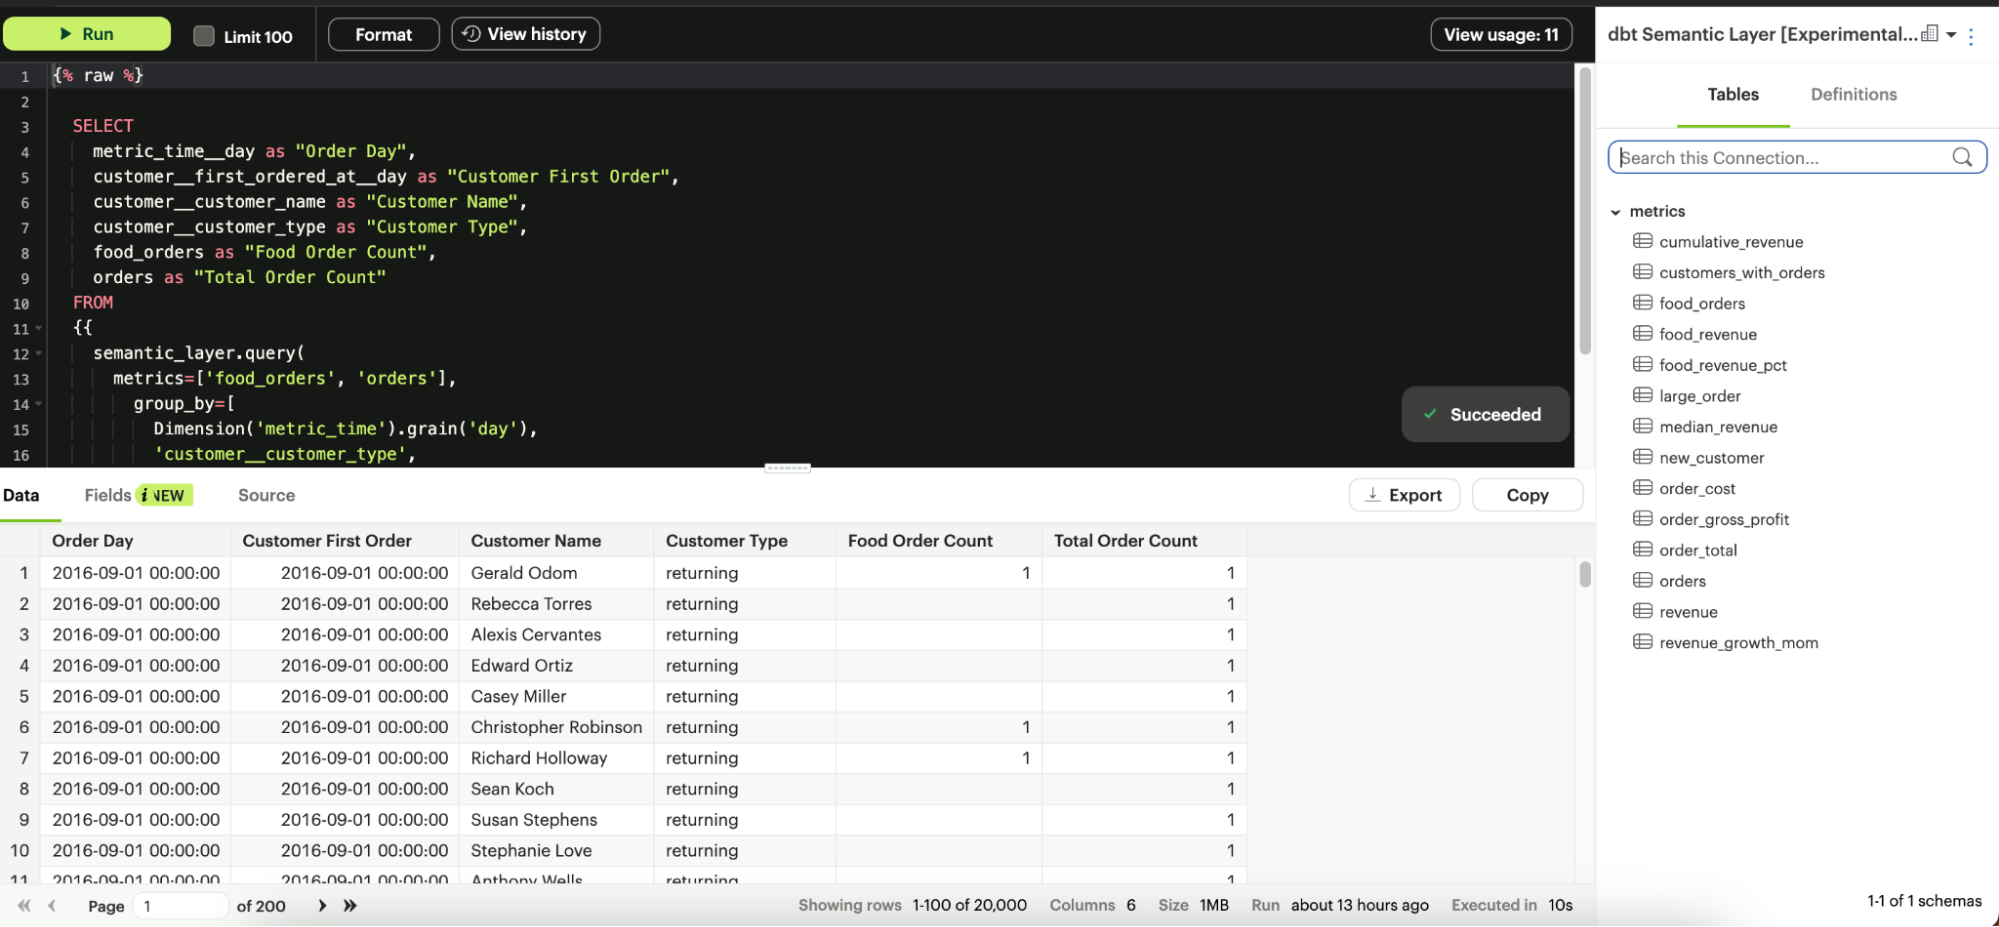
Write a dbt Metrics Query
To write a new dbt metrics query, select your dbt Semantic Layer connection from the database dropdown in the right panel. This connection will surface all available metrics to query. To reference a metric within your query, use the following syntax:
{% raw %}
select * from {{
	semantic_layer.metrics()
}}
{% endraw %}
{% raw %} {% endraw %} tags.For more information on how to query the dbt Semantic Layer, see dbt’s documentation.
Write a Looker SQL Query
To write a new Looker SQL query leveraging Looker's Open SQL interface, select your Looker SQL connection from the database dropdown in the right panel. This connection will surface all available Models and Explores to query. To reference a field within your query, use the following syntax:
SELECT `view.field`
  FROM `model`.`explore`
  LIMIT 10;
SELECT `customers.state`, `customers.city`,
  AGGREGATE(`orders.total_amount`)
FROM `ecommerce`.`orders`
GROUP BY `customers.state`, `customers.city`
HAVING AGGREGATE(`orders.count`) > 10
ORDER BY 3 DESC LIMIT 5;
For more information on how to query using Looker's Open SQL interface, see Looker’s documentation.
Share Semantic Layer Datasets
To share Datasets created from the semantic layer, select the dropdown next to the Dataset name to rename the Dataset, set up a schedule and publish the Dataset to a Collection.
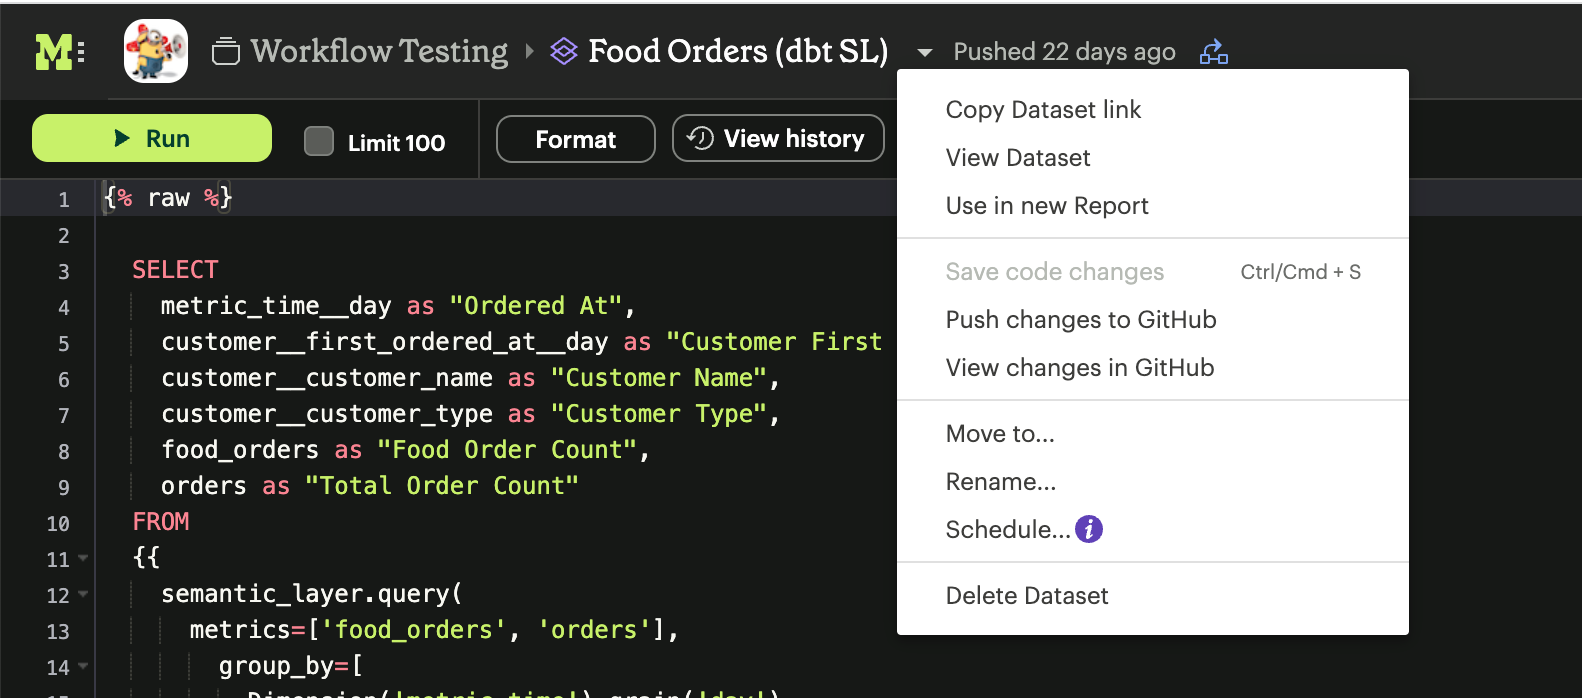
Select Rename to give the Dataset a name and description. Adding a name and description will ensure users can easily discover the Dataset and understand what data is included in the Dataset.
Select Schedule to add a new schedule. Adding a schedule ensures metrics data is updated for the Dataset on a regular cadence, so users building on top of the Dataset get the freshest data.
Select Move to… to move the Dataset into a Collection and make it discoverable to users. This will ensure users can find the Dataset when browsing or searching across Mode.
Was this article helpful?