Mode Help
Connect your database
Connecting Mode to your database
Getting ready to connect
Mode can connect to most popular databases that can be queried using SQL or a SQL-like language, including databases hosted on private networks or on private machines, databases hosted in VPCs and VPNs, and databases hosted in the cloud by third parties such as Amazon and Microsoft. By default, each database you connect to your Mode Workspace can be queried by all members of your Workspace.
Obtain database credentials and connection details
When you set up a new data connection, you will provide Mode with the credentials for a user account in your database that Mode will use to execute queries against the database. The permissions granted to this user account will govern which tables and records members of your Workspace can access when they use that database connection in Mode.
A best practice is to create (or ask your database admin to create) a new database user specifically to use with Mode. Grant this new user read-only permission for the schemas and tables you want your Mode users to be able to query.
Choose a connection method
Mode can connect to your database in two ways:
- Direct Connect: Mode will connect directly to your database over the public internet. This is the simplest way to connect, but may require your database or network to be configured to allow Mode's servers to connect to it.
- Bridge: Mode connects to your database with the assistance of a small helper application installed on a computer inside your network with direct access to your database. This solution lets Mode connect to your database even if it's not publicly accessible.
Typically, users are able to connect Mode to their database directly. There are, however, a few common scenarios in which you will likely need to use Bridge and/or seek the assistance of your network administrator to connect, namely if:
- You need to be connected to a VPN/VPC or physically in the office to access your database; or,
- You need to configure your database to allow Mode to directly connect (e.g., allowlist Mode's IP addresses), but you do not have access to the database's configuration console.
Direct Connect
Overview
Direct Connect is the simplest way to connect your database to Mode. You provide Mode with the necessary credentials, and Mode's servers connect directly to your database. Most databases hosted by third parties such as Amazon, Google, and Segment are publicly accessible and are compatible with Direct Connect. In some cases, databases hosted in private networks can also be publicly accessible and are compatible with Direct Connect.
Requirements
In order to use Direct Connect, your database must:
- Be publicly accessible via the internet (Not sure? Follow these steps)
- Have SSL encryption enabled
- Be allowed to accept incoming connections from Mode's IP addresses
Your database may require you to allowlist Mode's IP addresses before it will accept an incoming connection from our servers. All connections from Mode will come from one of these eight IP addresses :
54.68.30.98/32
54.68.45.3/32
34.209.23.118/32
54.188.241.100/32
52.43.195.103/32
3.224.146.111/32
54.221.238.89/32
52.20.173.236/32
If your database or network environment does not meet the above requirements, consider connecting with Mode's Bridge connector instead.
How to connect
To add a new data connection to your Workspace using Direct Connect:
- Navigate to the Mode home page for the Workspace to which you'd like to add the connection and click on your name in the top left corner.
- Click on Connect a Database.
- Select your database from the list.
- Follow the on-screen instructions to connect your database.
FAQs (Direct Connect)
Q: How do I know if my database is publicly accessible?
A database is "publicly accessible" if the server it is hosted on can be reached via any internet connection. Users aren't required to be logged into a VPN or on a private network to access the database.
To check if your database is publicly accessible, run the following command on a computer that's not logged into your VPN or private network. Replace your_db_host and your_db_port with the host and port of your database:
- Linux or OSX:
nc -v your_db_host your_db_port - Windows:
telnet your_db_host your_db_port
If the connection succeeds, your database is publicly accessible. If it fails, it likely isn't.
In some instances, however, the connection can fail because your database doesn't allow connections from IP addresses that haven't been added to a allowlist. If this may be the case, find your computer's IP address and add it to your database's IP address allowlist. Try the command above again. If it succeeds, your database is publicly accessible and can connect to Mode directly. Note that you may need to allowlist Mode's IP addresses in your database's configuration.
Q: Is it possible to connect to a database via SSH tunneling?
Although we don't currently support connecting databases via SSH tunneling, we do offer our Bridge software to connect to a database located on a private network or behind a VPC. You can read more about this process here.
Troubleshooting (Direct Connect)
1. When connecting to any database, your address is in a reserved range
Could not verify connection: Address ... in reserved range.
Your database may not be publicly accessible. You can check if your database is publicly accessible by following the steps in this section. If your database isn't publicly accessible, you should connect using Bridge.
2. When connecting to MySQL, there's a communications link failure
Could not verify connection: com.mysql.jdbc.exceptions.jdbc4.CommunicationsException: Communications link failure The last packet sent successfully to the server was 0 milliseconds ago. The driver has not received any packets from the server.
This is generic MySQL error that indicates Mode can't reach your database. There are a couple of common causes for this error:
-
Your database doesn't allow SSL connections: Direct Connect only supports SSL connections. If SSL is disabled on your MySQL database, Direct Connect will be unable to connect. To resolve this issue, you can either allow SSL connections to your database or connect using Bridge.
-
Your MySQL database isn't configured to allow external connections: Check the configuration file at
/etc/mysql/my.cnf. If thebind_addressis set to127.0.0.1, your database will only allow connections from your local machine. To allow external connections---which is required for connecting to Mode---change the bind address to0.0.0.0.
3. When connecting to Redshift, it says we're having trouble verifying your connection
Could not verify connection: We're having trouble verifying your connection. Please check that the hostname and port are correct and that your firewall is configured to allow connections from Mode.
This is a generic error that indicates Mode can't reach your Redshift database. There are a couple of common causes for this error:
-
Your Redshift security group or VPC security doesn't allow connections from Mode's IP addresses: If your Redshift is in a security group, you must configure that security group to allow connections from Mode's IP addresses. Note that if your Redshift is in a VPC, the VPC may also be part of security group that's distinct from the Redshift security group. This VPC security group must also allow connections from Mode. See this article about which IP addresses to allowlist, this article for how to configure security groups in your Redshift instance, and this article for more information on security settings for Redshift.
-
Use a Redshift host name rather than the IP address: Redshift host names are often formatted like this:
examplecluster.abc123xyz789.us-west-2.redshift.amazonaws.com. Try using a host of this format rather than an IP address. This host can be found in the middle of the JDBC URL, which typically matches the following format:jdbc:redshift://examplecluster.abc123xyz789.us-west-2.redshift.amazonaws.com:5439/dev.
4. When connecting to BigQuery, it says we couldn't verify your connection
Could not verify connection: com.modeanalytics.jdbc.bigquery.BQSQLException: toDerInputStream rejects tag type 123
This error occurs if you try to connect with a JSON key rather than a P12 key. When completing the last step of setting up your BigQuery connection, double-check that you're using a P12 key.
5. I get a connection error that says "The server does not support SSL"
This means that your database does not have SSL configured. To ensure your data remains secure, Direct Connect doesn't support connecting unless your database allows encrypted connections. To enable SSL, please refer to your database's website for information on how to configure TLS/SSL for your database.
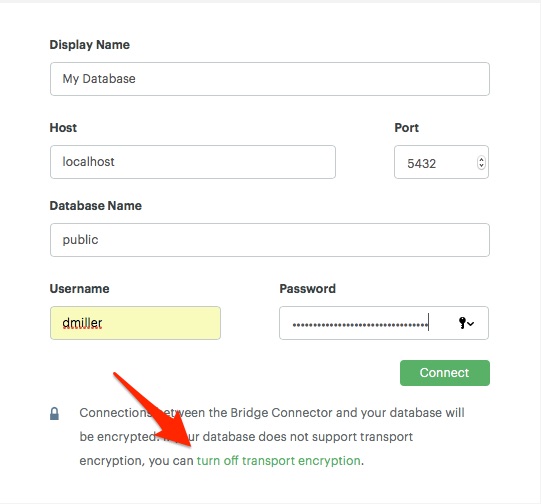
If you don't want to or can't enable SSL, you can connect your database to Mode using Bridge. Though Bridge connections use transport encryption by default, you can disable it by clicking the green "turn off transport encryption" link when setting up Bridge.
"Publicly accessible" databases aren't databases that can be queried by anyone in the general public---nearly all "publicly accessible" databases still require passwords and encrypted connections. Instead, "publicly accessible" means that the database can be reached via any internet connection. Users aren't required to be logged into a VPN or on a private network to access the database.
The easiest way to check if your databases is publicly accessible is to run the following command on a computer that's not logged into your VPN or private network. Replace host and port with the host and port of your database:
nc -v host port
If the connection succeeds, your database is publicly accessible. If it fails, it likely isn't.
In some instances, however, the connection can fail because your database doesn't allow connections from IP addresses that haven't been added to a allowlist. If this may be the case, find your computer's IP address and add it to your database's IP address allowlist. Try the command above again. If it succeeds, your database is publicly accessible and can connect to Mode directly, provided that the appropriate IP addresses are allowlisted.
Bridge
Overview
Typically, users will connect Mode directly to their database. However, there are many situations in which directly connecting Mode to your database is not possible or modifying the configuration of your VPN/firewall is not practical or desirable. For these cases, Mode offers an application ("the Bridge connector") to coordinate communication between Mode and your databases. The Bridge connector is easy to install, configure, and maintain.
The Bridge connector can run on a computer or virtual machine within your organization's VPN or firewall. Mode also supports running the Bridge connector inside a Docker container.
When you write and run a query in Mode, the Bridge facilitates the connection to your database. The query is executed by your database using the user credentials you provide when setting up Mode. Once complete, Bridge sends data back to Mode, so you can visualize and share the results.
Requirements
To install and configure Bridge, ensure the following:
- Your workspace must be on a paid plan to use Bridge
- You have sufficient (typically local administrative) privileges on the host computer.
- You must also have access within Mode to connect data sources for your Workspace.
- Bridge connects to Mode by making an outbound TCP connection to the Bridge server on port 443 or 8444.
- You can run Mode's Bridge connector as a container on any Linux host running Docker engine.
- The system meets the supported operating system requirements listed below.
Supported Operating Systems
The table below lists current distributions and their end-of-life timelines:
| Operating System / Distribution | EOL Reached | End of Standard Support | Final EOL (Extended Support) |
|---|---|---|---|
| Ubuntu 14.04 (Trusty) | Yes | April 2019 | April 2024 (Ubuntu Pro / ESM) |
| Ubuntu 16.04 (Xenial) | Yes | April 2021 | April 2026 (Ubuntu Pro / ESM) |
| Ubuntu 18.04 (Bionic) | Yes | May 2023 | April 2028 (Ubuntu Pro / ESM) |
| Ubuntu 20.04 (Focal) | Yes | May 2025 | April 2030 (Ubuntu Pro / ESM) |
| Ubuntu 22.04 (Jammy) | No | April 2027 | April 2032 (Ubuntu Pro / ESM) |
| Ubuntu 24.04 (Noble) | No | April 2029 | April 2034 (Ubuntu Pro / ESM) |
| Debian 8 (Jessie) | Yes | June 2018 | June 2020 (Debian LTS) / June 2025 (ELTS) |
| Debian 9 (Stretch) | Yes | July 2020 | July 2022 (Debian LTS) / June 2027 (ELTS) |
| Debian 12 (Bookworm) | No | June 2026 | June 2028 (Debian LTS) / June 2033 (ELTS) |
| Enterprise Linux 6 | Yes | November 2020 | June 2024 (RHEL ELS) |
| Enterprise Linux 7 | Yes | June 2024 | May 2029 (RHEL ELS) |
| Enterprise Linux 9 | No | May 2027 | May 2032 (RHEL Maintenance Support) |
| Oracle Linux 6 | Yes | March 2021 | December 2024 (Extended Support) |
| Oracle Linux 7 | Yes | December 2024 | June 2028 (Extended Support) |
| Oracle Linux 9 | No | June 2032 | June 2035 (Extended Support) |
| Amazon Linux 2 | No | June 2026 | June 2026 (Final EOL) |
| Amazon Linux 2023 | No | June 2027 | June 2029 (Security Support) |
| macOS 10.11 or later | - | - | - |
| Windows 10 or Windows Server 2012 R2 or later | - | - | - |
Install Bridge with Mode
These instructions assume that you meet the Requirements and would like to install Mode’s Bridge connector on a host computer you administer.
Our system packages will install Bridge and configure the system to run Bridge via the system’s service manager. Bridge’s configuration file 'bridge.json' contains a credential and should be kept secret when incorporating it into configuration management systems.
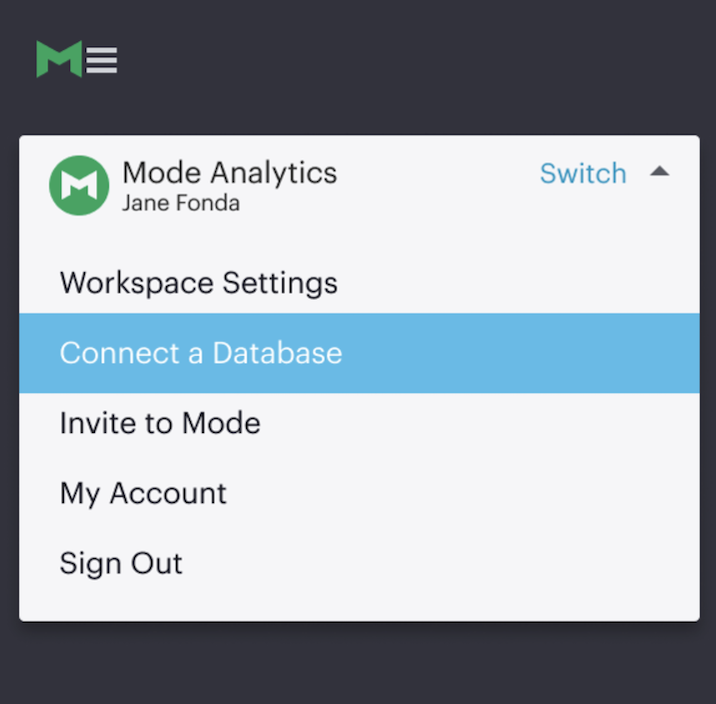
- In the upper left corner of your Workspace’s Mode home page, expand the menu under your name, and select Connect a Database from the dropdown.
- Click on the type of database you want to connect to Mode.

- Click on the 'Bridge connector' link above the connections details form.

- To install Bridge for the first time, click on the 'connect a new bridge' link.

- Select the operating system of your host computer and follow the onscreen prompts to copy & execute statements in the command line.
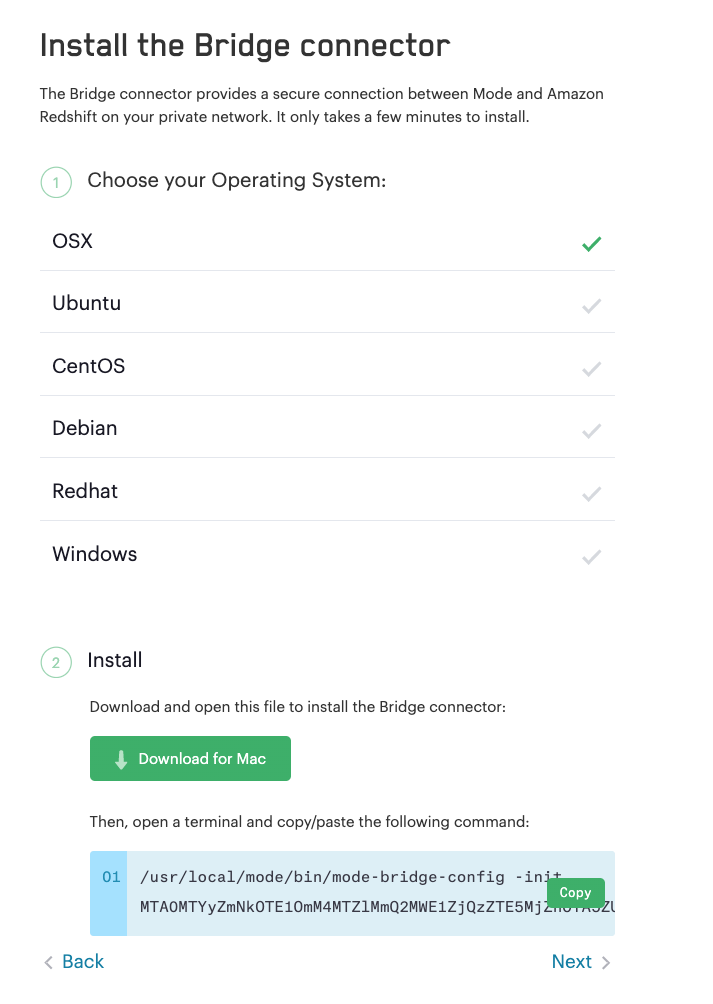
- Once Bridge is installed and running, click Next.
- You will be returned to the database credentials page, where you should see that the database will be connecting through your newly-installed Bridge connector.

- Fill out your database credentials and click 'Connect.'
Run Bridge in a Docker container
These instructions assume you meet the Requirements and would like to run Mode’s Bridge connector in a Docker container.
Generate Bridge Credentials
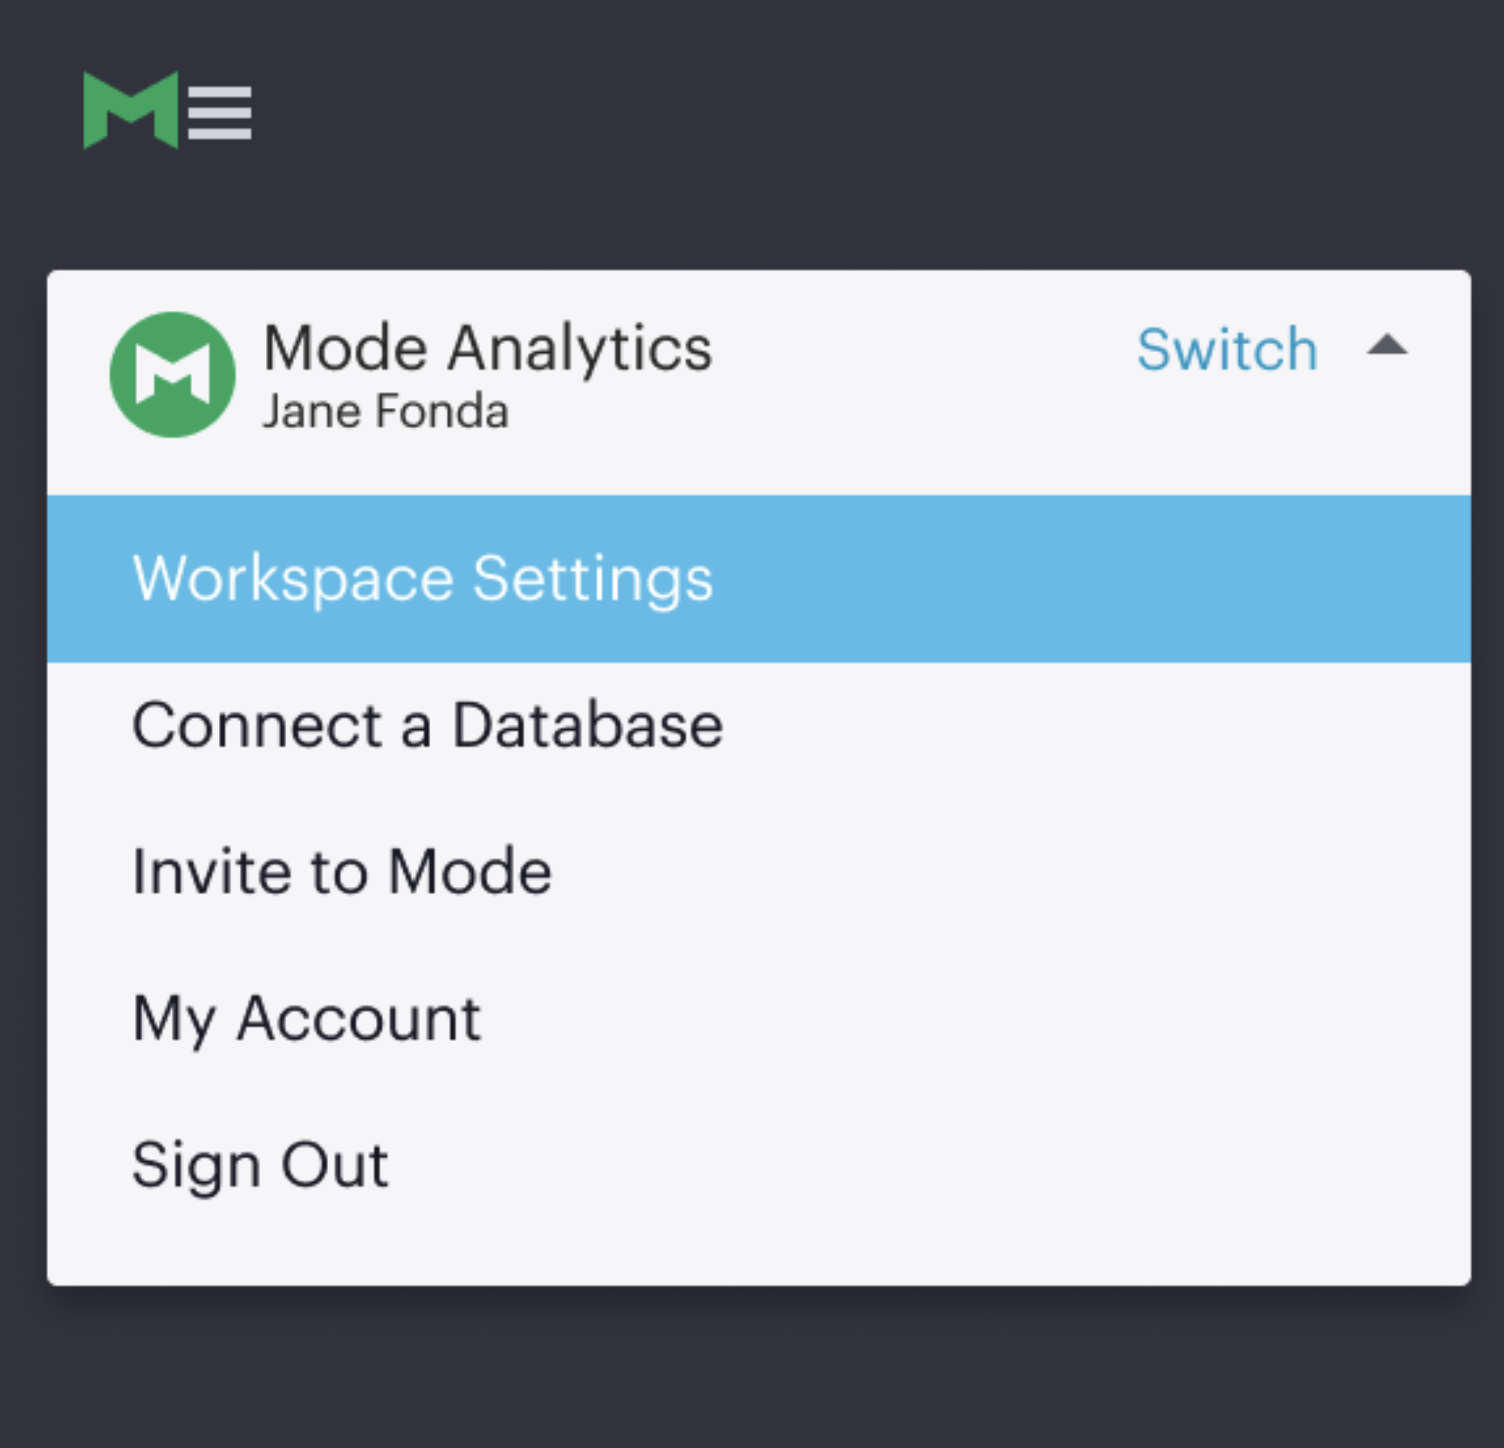
- In the upper left corner of your Workspace’s Mode home page, expand the menu under your name, and select Workspace Settings from the dropdown.
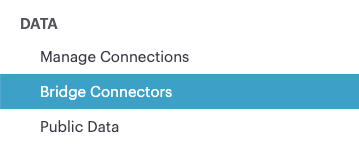
- In the left navigation, under Data, select Bridge Connectors.
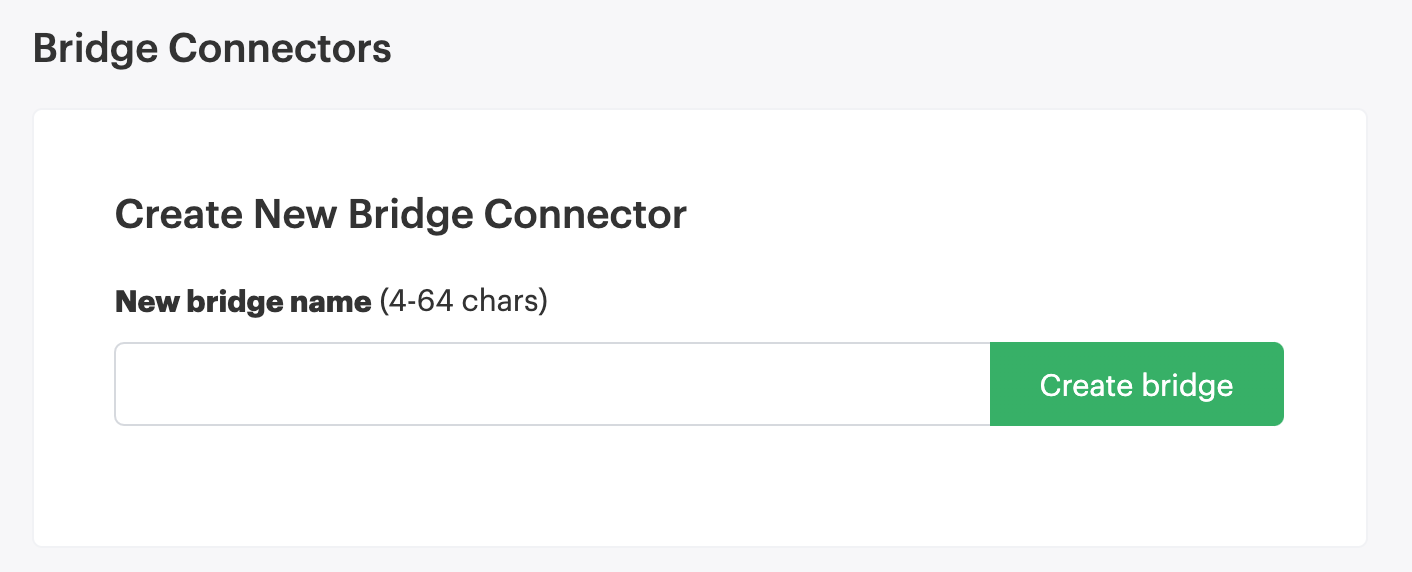
- Enter a descriptive name for your Bridge connector and press Create bridge. You will be able to edit this in the future.
- A panel will display a confirmation that the named Bridge was created and the credentials for that Bridge are displayed.
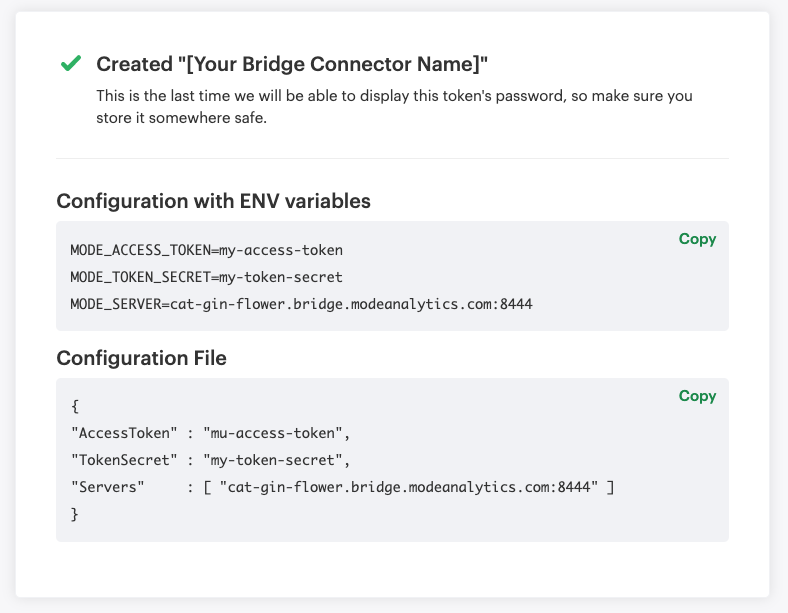
- Copy the Configuration with ENV variables. Save these to create a new configuration file for the Bridge connector. We recommend naming the file
/etc/mode-bridge.envon the host where you want to install Bridge.
Run Bridge in Docker
- Pull the latest Docker image from DockerHub using the command
docker pull modeanalytics/bridge-clientfrom a terminal. - Run the following command to download, create, and start your Bridge connector:
docker run --env-file /etc/mode-bridge.env --name mode-bridge modeanalytics/bridge-client:[Dockerfile Version] - Verify that your Bridge connector has been configured correctly. Inspect the logs for any error messages by running the following command:
docker logs --tail 30 mode-bridgeIf you discover you need to make any corrections to your configuration file, edit the file and then restart your container to apply the changes by running the following command:docker restart mode-bridge
Connect your Database via Bridge
- In the upper left corner of your Workspace’s Mode home page, expand the menu under your name, and select Connect a Database from the dropdown.

- Click on the type of database you want to connect to Mode.

- Click on the 'Bridge connector' link above the connections details form.

- Select the name of the Bridge connector running in Docker.
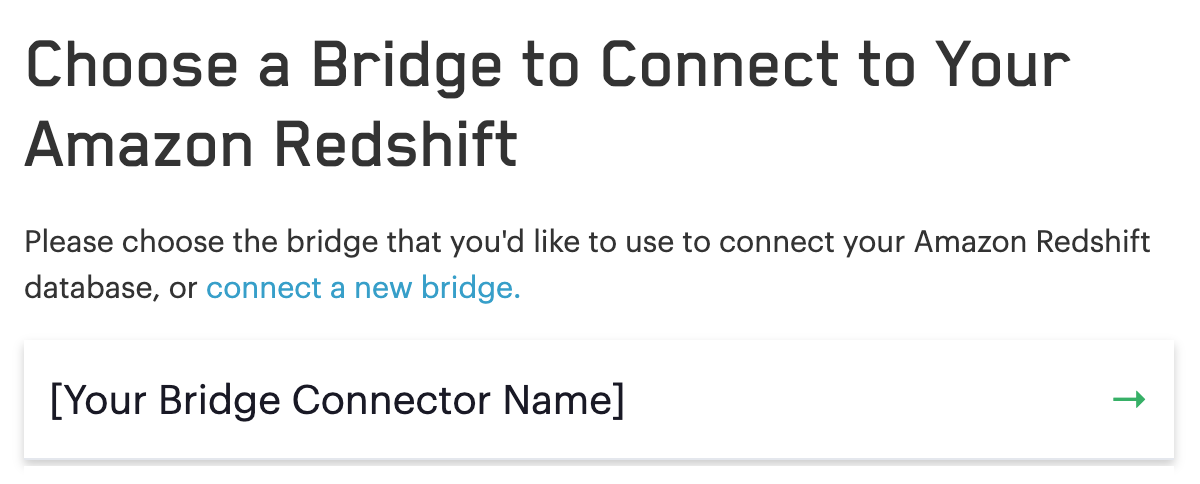
- You will be returned to the database credentials page, where you should see that the database will be connecting through your Bridge connector.

FAQs (Bridge)
Q: Do I need to run several Bridge connectors to connect Mode to several databases?
No. A single Bridge connector can support multiple databases.
Q: What data does the Bridge connector have access to?
The Bridge connector provides a tunnel through which Mode’s platform can connect to your database(s). The connection between the Bridge and Mode is fully encrypted. The Bridge connector stores only its own configuration. There is no caching or database driver in the Bridge. No database credentials, queries, or query results are stored within the connector.
Q: What happens if I disable transport encryption?
Some older databases either do not support or have not been configured to support transport encryption. To enable customers to connect Mode to these databases, we support disabling transport encryption, but only when connecting via the Bridge.
If you disable transport encryption when configuring the Bridge connector, this will disable the encrypted connections between the computer running the Bridge connector and your database. However, all communication between the computer running Bridge and Mode will still be fully encrypted.
Q: How can I replace an existing Bridge connection?
To replace an existing Bridge connection, first remove the existing Bridge from Mode.
- Click on your avatar in the upper left.
- Select Settings from the dropdown.
- Click on Bridges under the appropriate Workspace name.
- Remove the Bridge from that page.
Next, add the new database.
- Click on your avatar in the upper left.
- Select Connect a database from the dropdown
- Click on the Database on a Private Network tab
- Select the appropriate database type.
The next page should prompt you to install Bridge. Because you already have Bridge installed, skip to the final step that asks you to run mode-bridge setup. On the machine where you're running Bridge, add -replace to the command listed and run the entire command. The new command should look like this:
mode-bridge-setup -replace -init BIG_BLOG
Finally, restart the Bridge application.
Q: Where does the Bridge Connector install?
Bridge will install in one of the following locations, depending on which operating system the host computer is using. To install and configure Bridge, you must have sufficient (typically local administrative) privileges on the host computer.
| OS | Install Directory | Log File |
|---|---|---|
| Linux | /opt/mode/bridge< | /opt/mode/bridge/bridge.log |
| OS X | /usr/local/mode/bin< | ~/.modeanalytics/bridge.log |
| Windows | C:\Program Files\Mode Analytics\Bridge Connector\ | Windows Event Viewer |
Q: Where is the Bridge configuration file saved?
You can locate the configuration file using the following OS-specific paths:
- Linux: /opt/mode/Bridge/conf/Bridge.json
- Mac: $HOME/.modeanalytics/Bridge.json
- Windows: C:\Program Files\Mode Analytics\Bridge Connector\Bridge.json
Q: How do I stop or start the Bridge connector?
The commands to start or stop Bridge vary across operating systems. If you don't see commands listed for your system below, please contact our success team.
| OS | Stop Bridge | Start Bridge |
|---|---|---|
| OSX | launchctl stop com.modeanalytics.bridge | launchctl start com.modeanalytics.bridge |
| Ubuntu | sudo stop mode-bridge | sudo start mode-bridge |
| Ubuntu 16.04 | sudo systemctl stop mode-bridge | sudo systemctl start mode-bridge |
| UCentOS | sudo /etc/init.d/mode-bridge stop | sudo /etc/init.d/mode-bridge start |
| CentOS 7+ | sudo systemctl stop mode-bridge | sudo systemctl start mode-bridge |
| Linux | /etc/init.d/mode-bridge stop | /etc/init.d/mode-bridge start |
| Windows | Windows Services Manager | Windows Services Manager |
Q: Where in Mode can I view the password (token secret) for the Bridge connector that I created?
The token’s secret is a protected string and is not visible in the Mode UI after initial creation. If the configuration files displayed were not copied or saved somewhere by the user, they should be considered lost forever. We recommend deleting this bridge and creating a new one.
Q: How do I know the Bridge connector is running correctly in Docker?
To verify that your Bridge connector has been configured correctly, you can inspect the logs for any error messages by running the following command:
docker logs --tail 30 mode-bridge
If you discover you need to make any corrections to your configuration file, edit the file and then restart your container to apply the changes by running the following command:
docker restart mode-bridge
Troubleshooting (Bridge)
1. When connecting to any database, Bridge says it could not verify the connection.
You may see several error messages that say Bridge could not verify the connection.
Could not verify connection: please try again.
Could not verify connection: We're having trouble verifying your connection. Please check that the hostname and port are correct and that your firewall is configured to allow connections from Mode.
This error indicates that Mode could reach your Bridge connector, but Bridge couldn't reach your database.
You may see this error if your database credentials are invalid. As a first step, check the credentials and try again. Note that if your database doesn’t have a password, entering any password should fix this error.
If you're sure the credentials are correct, these errors can also occur when Bridge is installed on a machine that can't access your database. Importantly, this error occurs from the perspective of the machine running Bridge, not necessarily from your computer or from Mode's servers. Most commonly, this error occurred when your database is accessible only to computers inside a VPN. If you installed Bridge on a computer outside your VPN or if the computer is not currently logged into the VPN, Bridge won't be able to connect to your database.
You can test if the machine running Bridge has access to the database by running this command on the machine running Bridge:
- Linux or OSX:
nc -v your_db_host your_db_port - Windows:
telnet your_db_host your_db_port
If the command succeeds, the computer has access to the database. You can contact Mode support for further assistance.
If the command fails, the computer running Bridge doesn't have access to the database. To fix this, you should either install Bridge on a machine that has access or adjust your network settings so that the machine running Bridge has access to your database.
2. When connecting to any database, Bridge says it could not verify the connection and that there was a problem connecting to your Bridge Connector.
Could not verify connection: There was a problem connecting to your Bridge Connector.
This error indicates that Mode couldn't reach your Bridge connector.
First, check if Bridge is running with the command listed below.
- Linux or OSX:
ps aux | grep mode-bridge - Windows: Look in Service Manager to see if Bridge is running.
If Bridge is not running, restart the Bridge application
If Bridge is running, Mode may not not be able to reach Bridge because the ports that Bridge connects over are closed. Bridge connects to Mode over outbound port 8444. You can confirm that the port is open for Bridge by running these commands on the computer running Bridge
-
For Linux or OSX:
nc -v cat-gin-flower.bridge.modeanalytics.com 8444 -
Windows:
telnet cat-gin-flower.bridge.modeanalytics.com 8444
If these commands fail, you must open the outbound port on your network and on the computer running Bridge.
If the port is open and you still see this error, your Bridge config file may not match what Bridge is looking for. If you have made manual changes to the config file, either revert your custom changes and try connecting again or contact Mode support for additional help.
3. When installing Bridge on Windows, Bridge is unable to write to config.json
Unable to write to ...\config.json
This error typically occurs when you attempt to install Bridge without the proper permissions. To resolve, open an instance of PowerShell with elevated privileges (Run as Administrator) and use that instance to install Bridge.
Security
Mode supports TLS/SSL (Transport Layer Security/Secure Socket Layer) for encrypting communication with your database. This type of security, which encrypts data while it's in transit, is commonly referred to as transport encryption.
For additional auditing, Mode tags each query with additional metadata which will appear in the database system logs:
- The Mode username and email address of the user running the query.
- A link to that query in Mode, which includes the time the query was run and the exact dataset returned.
At Mode, we take security very seriously. Learn more about Mode's approach to security.
Was this article helpful?